Dorik - Integration / Setup
In this article, you'll learn how to translate all your content and make your Dorik store multilingual within minutes.
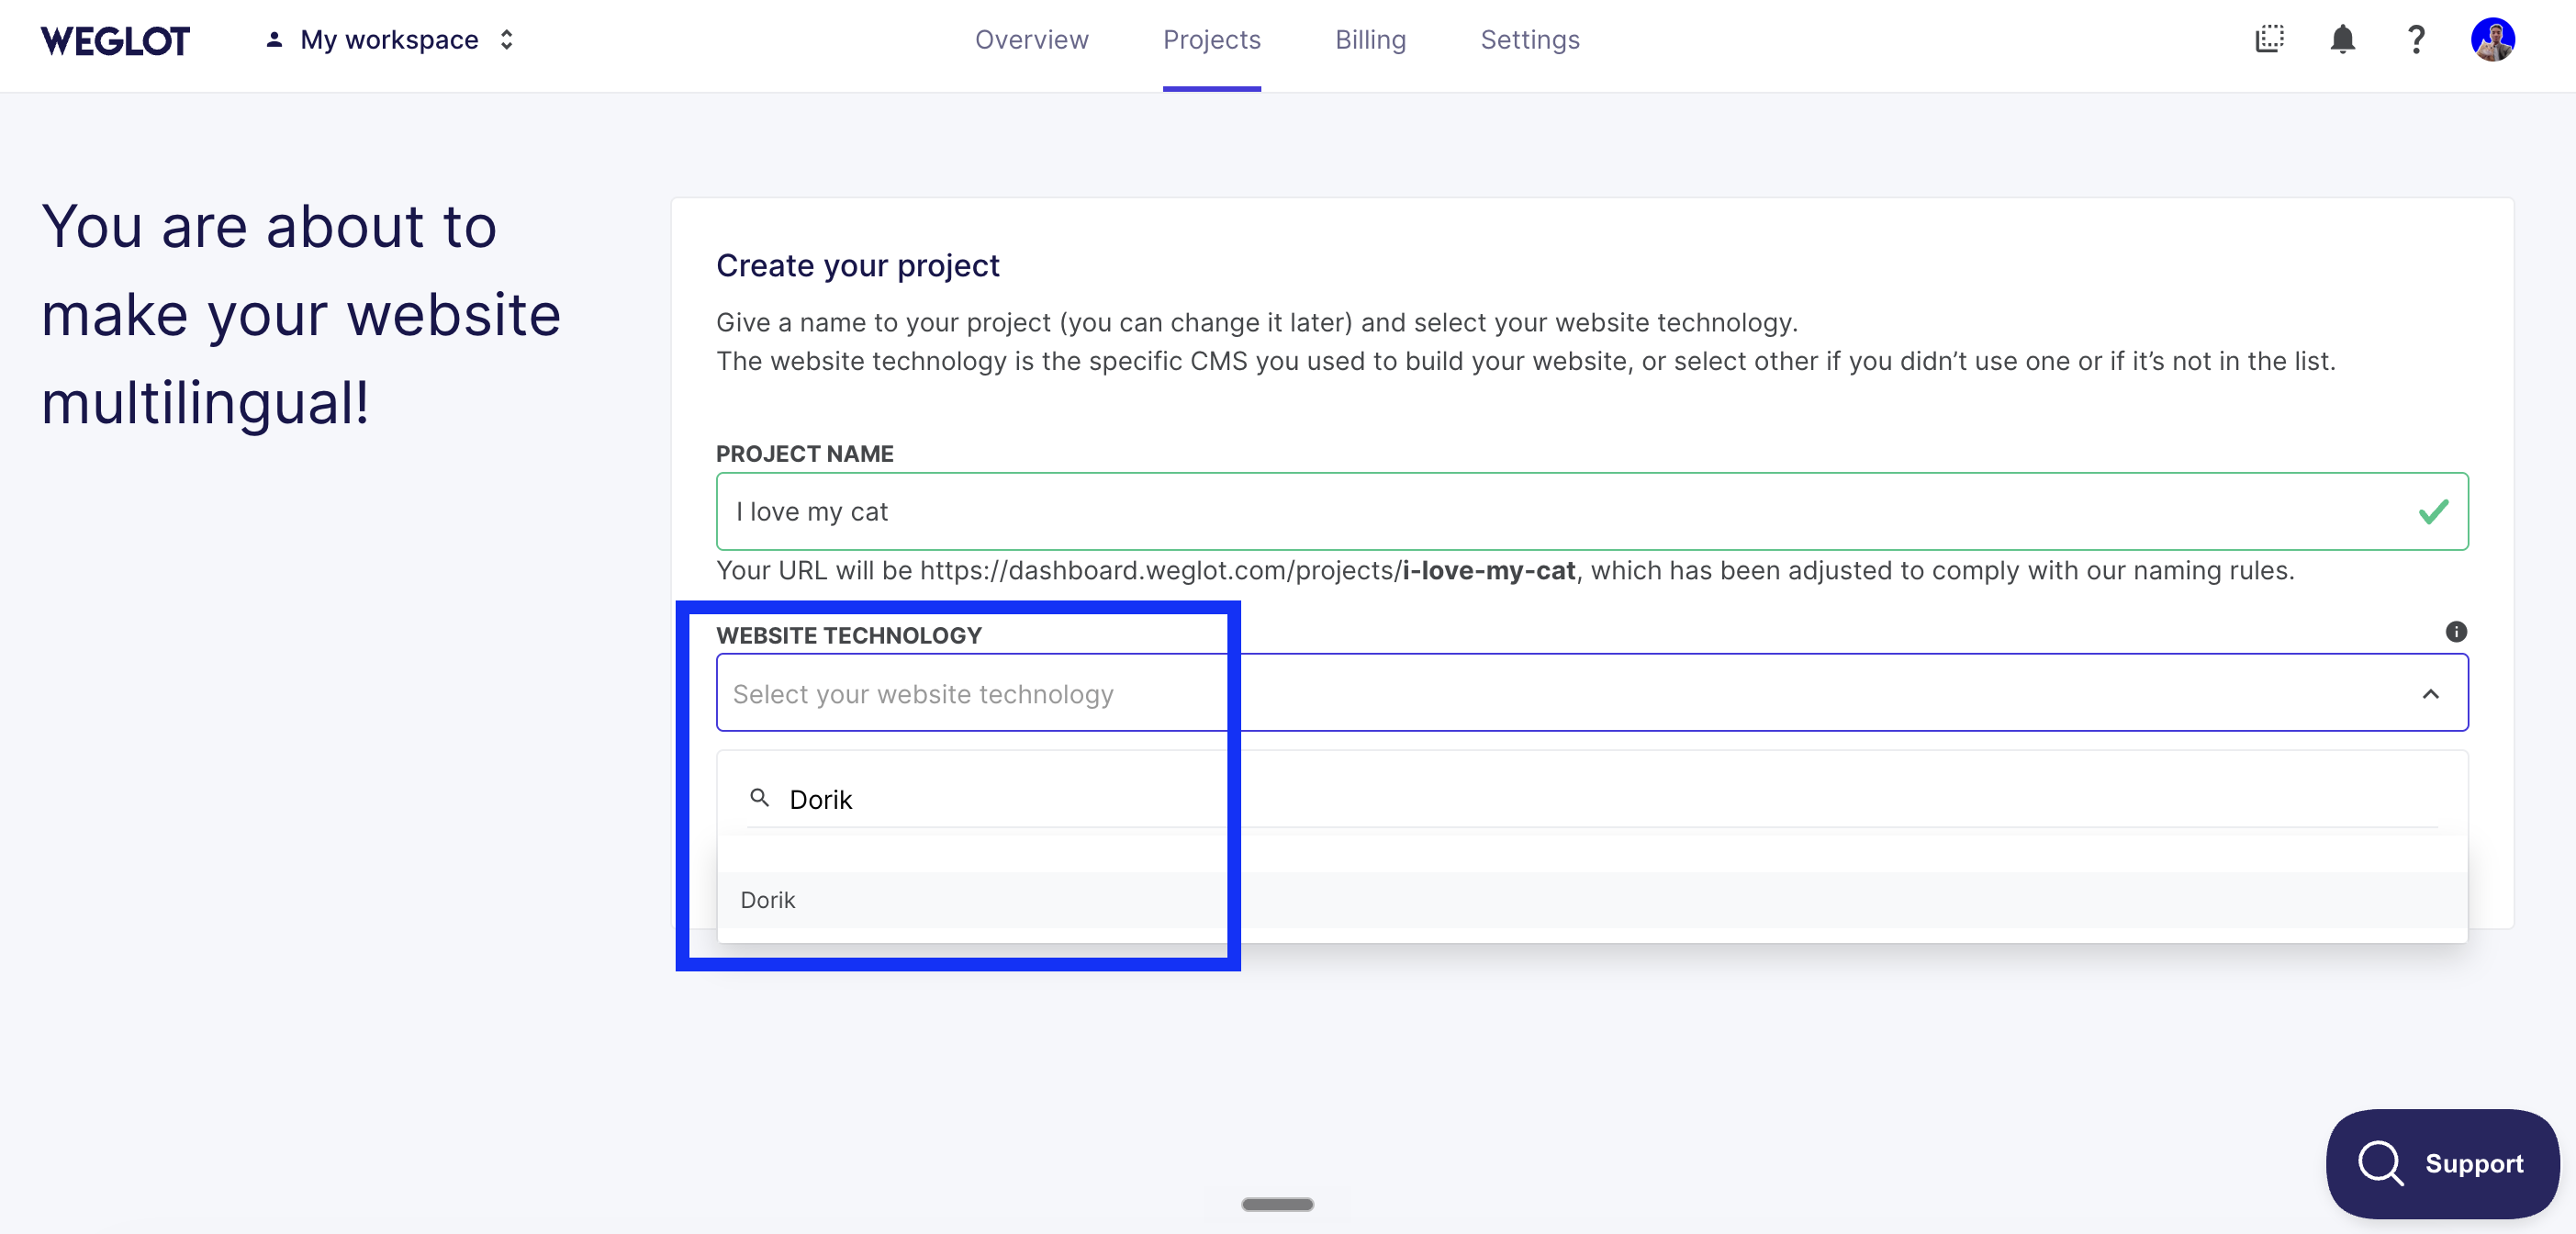
Step 1: Create a Weglot account
Sign up for Weglot, confirm your email, name your project in the dashboard, then select “Dorik” as the website technology.
Step 2: Add your new languages
Choose your website's original language and the languages you want to translate your website into.

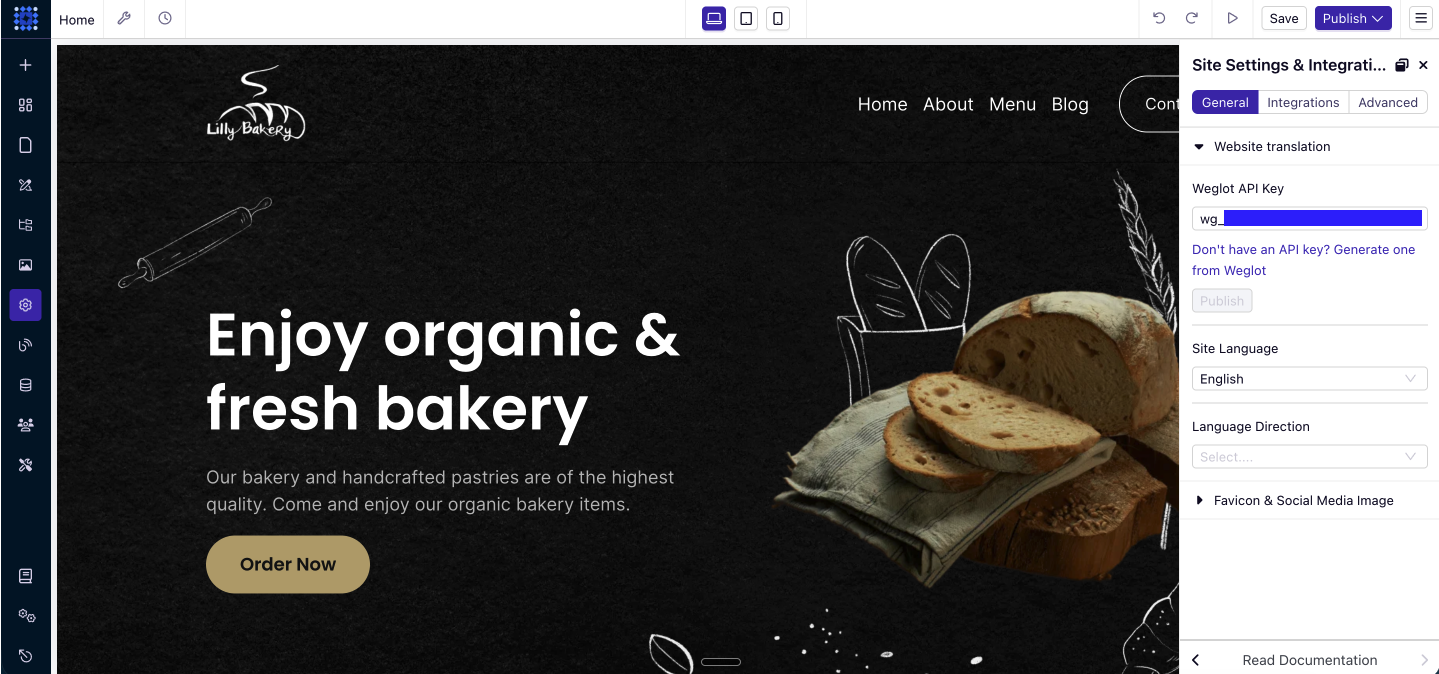
Step 3: Add Weglot to Dorik
Copy and paste the Weglot API key provided in your dashboard into Dorik .

In your Dorik site dashboard, click on "Settings", go to “General” > “Website translation”, then add the Weglot API key:
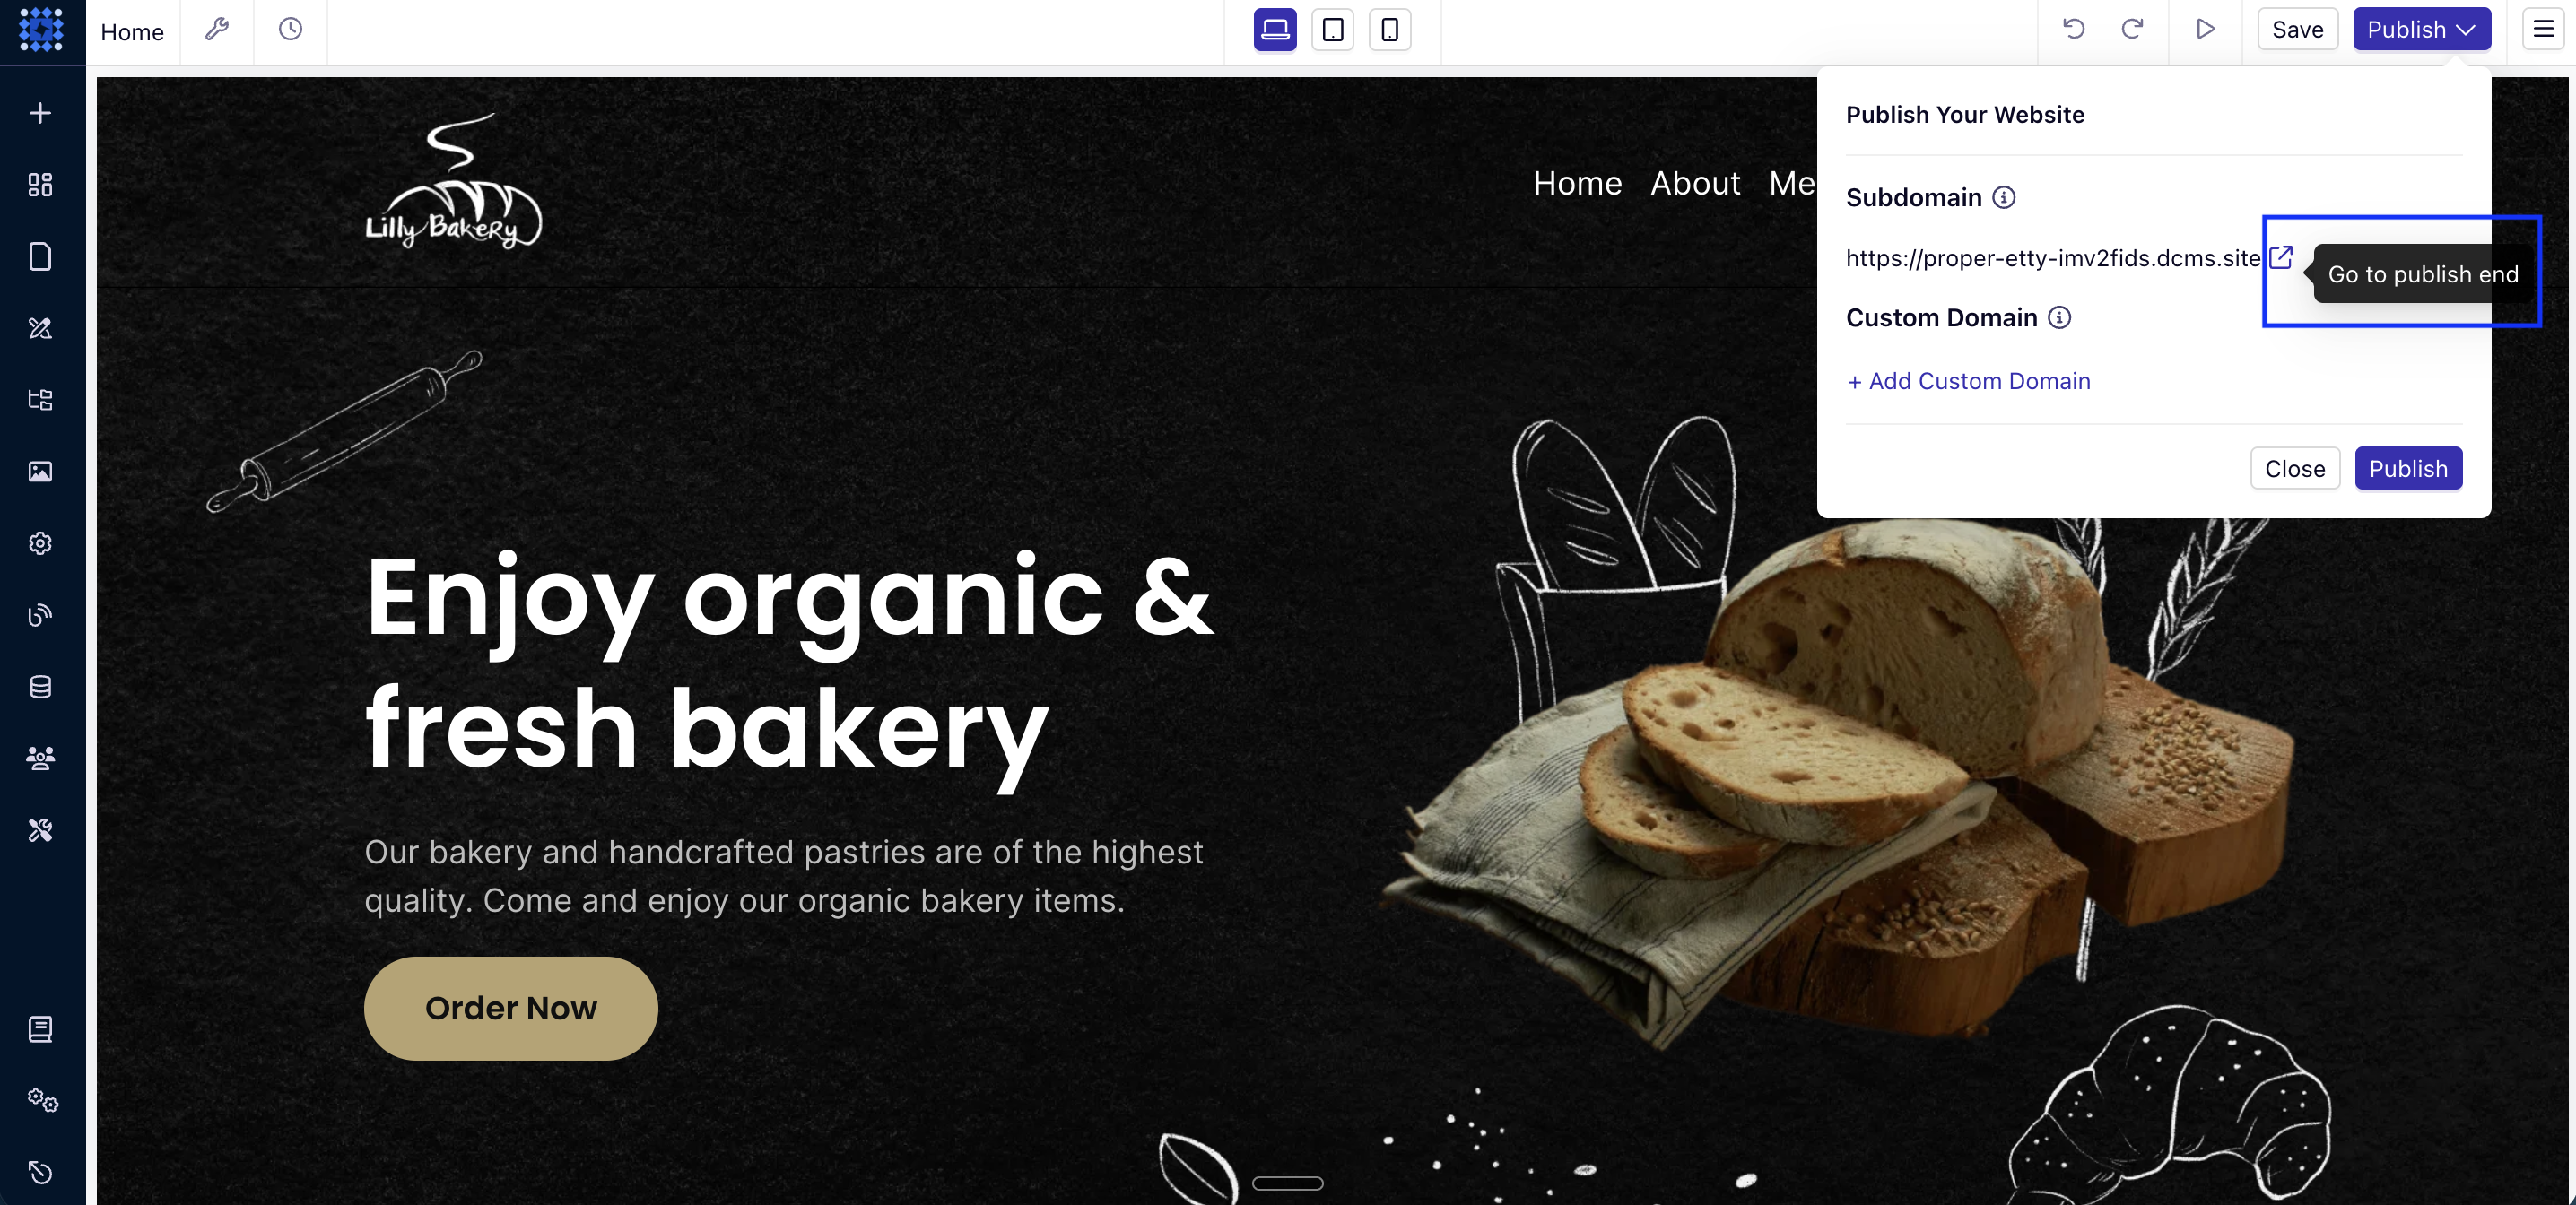
NB: Don't forget to click the “Publish” button and see the integration live by clicking "Go to publish end".
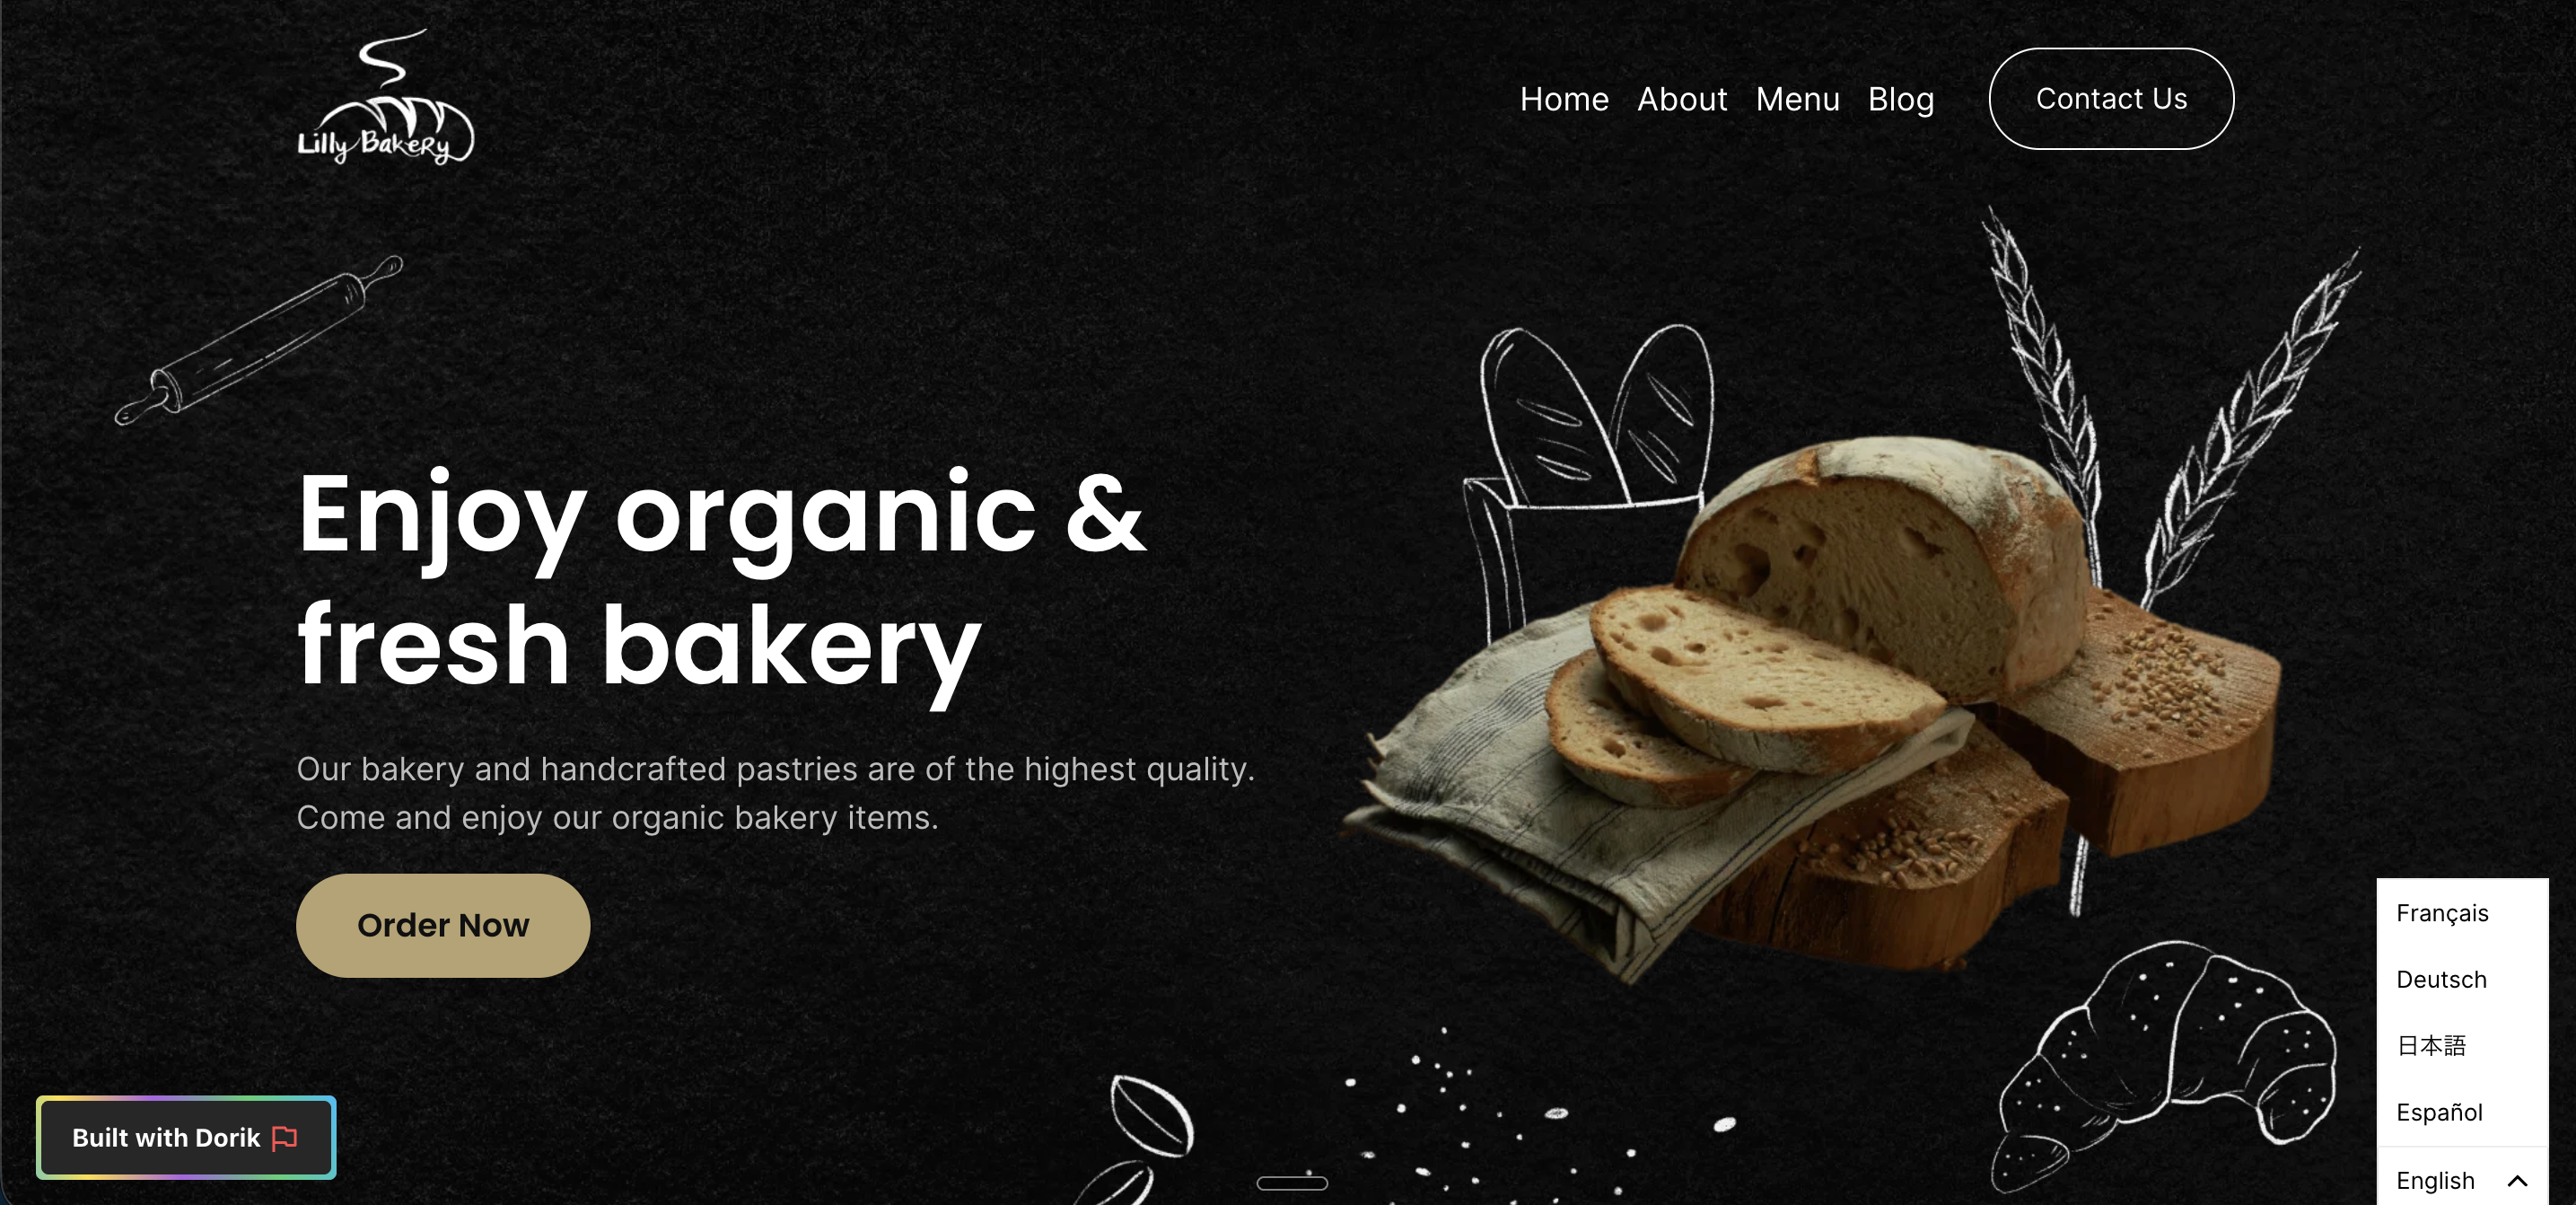
Your website is now translated!
You've now successfully translated your website. Go to your website, and you'll see a language switcher at the bottom right of your site (it may take a few minutes to appear). You can also change its position - check out our guide to find out how.
If you need help adding Weglot to your Dorik site, don't hesitate to reach out to us at support@weglot.com.
Weglot provides you with a first layer of translation. To view them, log in to your Weglot account and go to your Dashboard> Translations > Languages. Here, you can review and manually edit all your translations.