Lovable - Integration/Setup
In this article, you'll learn to translate all your content and make your website multilingual within minutes.
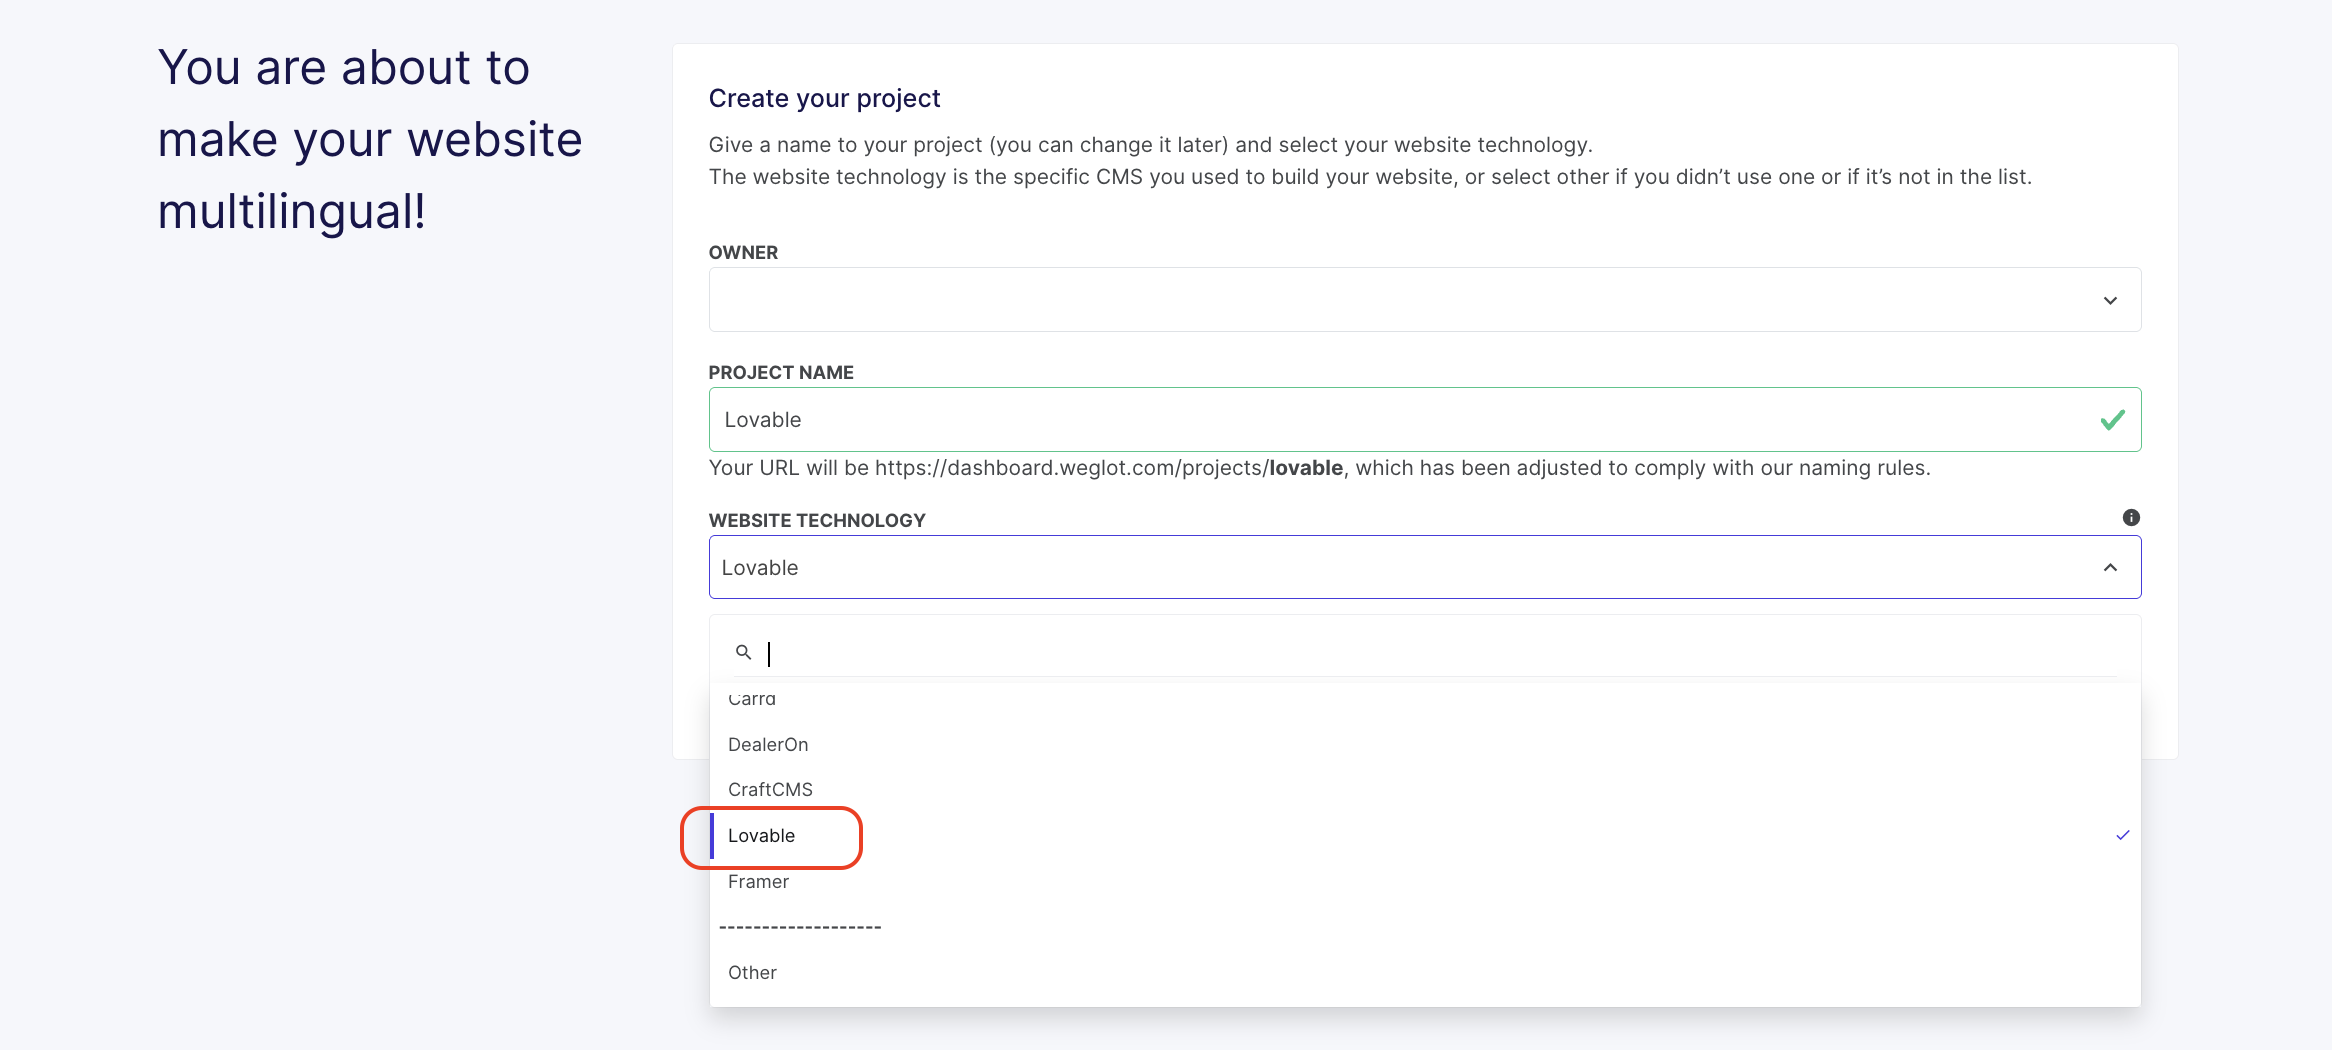
Step 1: Create a Weglot account
Sign up for Weglot, confirm your email, name your project in the Dashboard, and select "Lovable" as the website technology.
Step 2: Add your new languages
Choose your website's original language and the languages for translation.

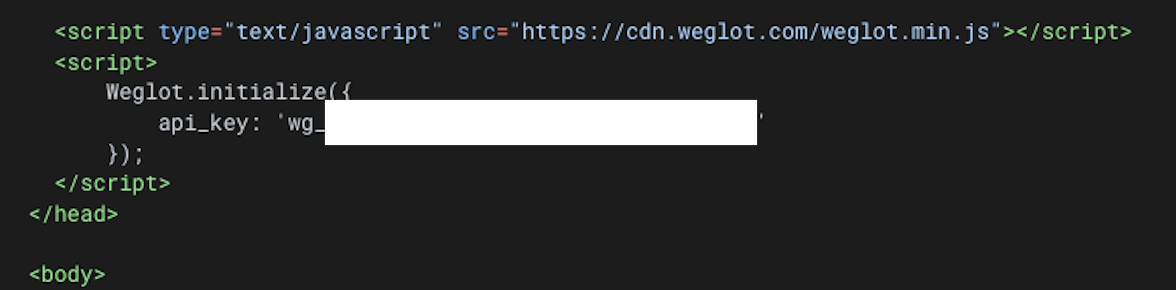
Step 3: Add Weglot to Lovable
Copy and paste the Weglot snippet provided in your Dashboard into Lovable.

In your Lovable Dashboard, select your "Project", go to the chat, and ask Lovable to add the Weglot JS snippet to your website's HTML header (the code will be slightly different if you choose subdomains):
<script type="text/javascript" src="https://cdn.weglot.com/weglot.min.js"></script>
<script>
  Weglot.initialize({
      api_key: 'Your API Key'
});
</script>”

Note that using the chat will cost you 1 Lovable credit.
If you don't want to use a Lovable credit and have a paid subscription on Lovable, you can use the "Code Mode" to integrate Weglot into your website.
To do so, just click on this option at the top:

Then, go to the "index.html" file and add the Weglot script just before the ⟨/head⟩ tag:
Your website is not entirely translated? In your Dashboard> Settings add a dynamic rule with the "body" selector.

Your website is now translated!
You've now successfully translated your website. Go to your website, and you'll see a language switcher at the bottom right of your site (it may take a few minutes to appear). You can also change its position - check out our guide to find out how.

Weglot provides you with the first round of automatic translation. To view them, log in to your Weglot account and go to your Dashboard> Translations > Languages. Here, you can review and manually edit all your translations.