Thinkific - Integration / Setup
Translate your Thinkific website
Translate all your content and make your Thinkific website multilingual within minutes.
1) Create an account on Weglot
This account will be where you manage and edit all your translations. You can create your Weglot account here.

You should receive a validation email in the account with which you signed up.
Then select “other” as your website technology.
2) Add your new languages
Once you’ve set up an account, select the original language of your site and the language you want to translate your site into.

After clicking on "Next", add your domain name, and select the URL type you want.

NOTE: If you’re using a temporary Thinkific domain name (for example xxx.thinkific.com) you should use the “Javascript integration” instead. You can do it by clicking on the "Get Started" option. Once you have a permanent domain, you can continue with this integration, which will give you language subdomains.

Click on the “Next” button.
3) Configure the subdomains in the DNS records
This next step is where you’ll configure your DNS records to create and connect the subdomains. These subdomains will display the translations of your Thinkific website once configured.
For this example we’re using GoDaddy as our domain name provider – but the process is similar no matter which domain name provider you’ve purchased your domain from (e.g: Google Domains, NameCheap, Dreamhost, etc.). If you need any help setting up your DNS records, feel free to contact us at support@weglot.com.
On your Weglot account setup, you’ll see the following DNS entries to add (note: this example is for setting up English):

Now, go to your domain name provider account and to the section or page where you can manage the DNS and add the entries shown on your Weglot dashboard (for instance, in Gandi, it looks like this).

Save the entries, go back to your Weglot dashboard, and click on the ‘Check DNS’ button. This process can take up to 10 minutes, so don’t worry if the green tick doesn’t appear immediately on your Weglot setup dashboard. Once that’s done, you’ll be able to proceed to the next step.
4) Add the Javascript code
This will allow you to add a language-switcher button to your Thinkific website.
- Go to your Thinkific website, and click on “Settings” > “Code & Analytics”
- Go to “Site footer code”
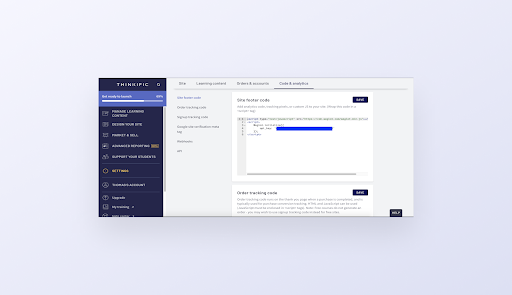
Keep in mind that the "Site footer code" section is only available for non-free Thinkific accounts.
- Copy and paste the JavaScript snippet provided to you on your Weglot account. It will look like the following one.

Click on the green button, “Save Changes” and publish your changes by clicking on the blue button at the very top right.
5) Your Thinkific website is now multilingual!
It’s done, your Thinkific course website is now translated into multiple languages. You’ll now be able to see the language switcher at the bottom of the website and use it to switch between languages. Weglot automatically provides you with a first layer of automatic translation, you can then edit your translations from your Weglot account.
Additional step: Translating your Thinkific courses Go to your Weglot dashboard > Settings > App Settings and add the ID #player-wrapper as a dynamic setting.

Your courses are now available in multiple languages.